
Pipe Cleaner DIY Tutorial Grump Tree
Thomas XuPipe Cleaner DIY Tutorial Grump Tree
Introduction:
Hi! This is Thomas, the founder of Fuzzy Pipe. A bit about me: I was laid off earlier this year, felt very lost and got pretty depressed, and moved back to my parent’s house. I tried everything to get out of my own head and somehow found pipe cleaner crafts. The hands-on experience was really fun and also had a meditative effect on me that I gradually stopped having racing thoughts and self-doubts. I started this business with the intention to introduce more people to this fascinating craft and to help those who are in tough mental states.

This is the tutorial for our Grump Tree DIY kit, here’s everything you have in the kit or the miso en place in cooking terms. You can also check out our tutorial video here!

What's in the kit:
Here's everything you have in the kit: 156 green pipes, 5 neon yellow pipes, 1 white pipe, 1 red pipe, 6 decorative balls, 1 red christmas ribbon, a piece of nonwoven fabric, a free glue gun and a few glue sticks. Feel free to plug in the glue gun now, just be careful with the tip and the hot glue. We’ve also put extra pipe cleaners of each color in the kit, so don’t worry about messing up, you should have more than enough pipe cleaners to work with. I’ve also spent a ton of time searching and found the most premium pipe cleaners in the market, so you wouldn’t have much of those annoying fluff falling off.

Step 1: roll the fabric into a cone shape
To start, roll the non woven fabric into a cone shape. This will be the foundation of your grump tree. Use the glue gun to glue the outermost layer of the fabric to the cone, so the fabric doesn’t unravel itself. Cut the extra fabric at the bottom of the cone so that the cone has a base to stand on its own. Remember to start with smaller cuts and make adjustments accordingly. Then wrap and glue the green pipe around the cone from top to bottom. You should now have a basic cone shape structure.


Step 2: roll some curly fries!
Next wrap a green pipe around a pen, pencil, marker, or even your finger, and turn the pipe into the shape of curly fries. These will be used as the pine needles for the grump tree so you will need to make about 70-100 of these depending on the size of your cone.

Step 3: attach the pine needles to your cone
Once you have a bunch of the pine needles, you can start attaching them to the cone structure with the hot glue one layer at a time. Start at the very bottom and only glue the top end of the pine needle to the cone, so the rest of the needles hang down past the bottom. You can either space them out a little like I did in the video, or put them really tight together to make the tree more dense looking. After you finish the first layer, attach the next layer of the pine needles in between the needles in the first layer to create a better layering effect. Again, only glue the top end of the pine needle to the cone, so the rest of the needle hangs down past the layer below. Now repeat the process until you’ve covered the entire cone with pine needles.

Step 4: attach a winding branch to the top
Next we will make a winding looking branch at the top to finish it off. Fold a green pipe in half, then attach another pipe at the halfway mark by twisting the ends together, and wrap the additional pipe around the pipes in half. After that use additional pipes to make the bottom half of the branch thicker than the top. Bend it into the shape you like and attach it to the top of the tree with hot glue. Add more pipes or hot glue to attach it firmly to the tree at your discretion.

Step 5: attach a winding branch to the top
To make the star at the end of the branch, grab 3 yellow pipes, cut them three times to make 9 even length pieces. Each piece is about 1.5-2 inches in the tutorial. Next use a lighter to burn both ends of each piece to make them more pointy. Feel free to use scissors to trim the ends if you don't have a lighter.
Once you are done, wrap all 9 pieces together with one of the leftover yellow pipes, wrap the pieces around, twist to secure them and cut off the extra length. Now bend and spread the pointy pieces to turn it into the star structure or a spikey ball. Use the hot glue to attach it to the very end of the to branch.

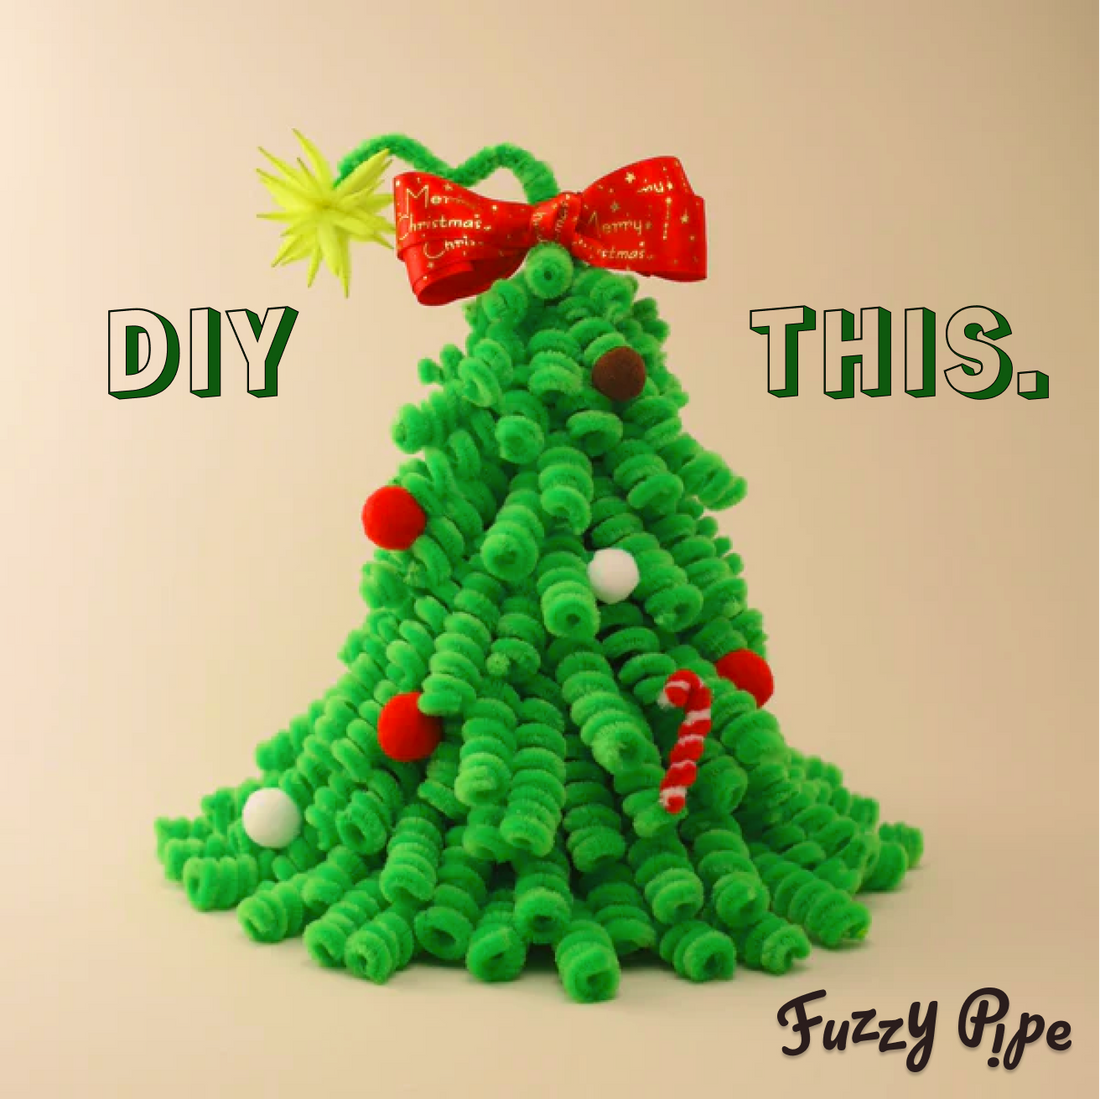
Now the tree is pretty much done, feel free to decorate it however you like using the rest of the material in the kit

You are done!

Now that you have seen our Grump Tree DIY Pipe Cleaner Tutorial this holiday, check out other FuzzyPipe pipe cleaner kits! Our team selects the best pipe cleaners, and our pipe cleaner craft designers spend every week designing these DIY plushies that you can make at home as home decor 🎁
Check out other DIY craft ideas:
- 12 DIY Craft Ideas for Adults to Do at Home
- 9 ADHD-Friendly Hobby Ideas for Adults
- How to Make Cosmos Flowers with Pipe Cleaners?
- 7 Pipe Cleaner Animal Craft ideas For Adults and Kids
- 20+ Art & Crafts To Make With Pipe Cleaners
- 16 Awesome Pipe Cleaner Crafts For Adults